Securing Windows Remote Desktop Access
Usually setting up a basic RDP connection is sufficient enough for most intents and purposes but let's say that we require additional security. Then please allow me to demonstrate how to become proficient at elevating security when allowing Remote Desktop Access.
STEP 1:
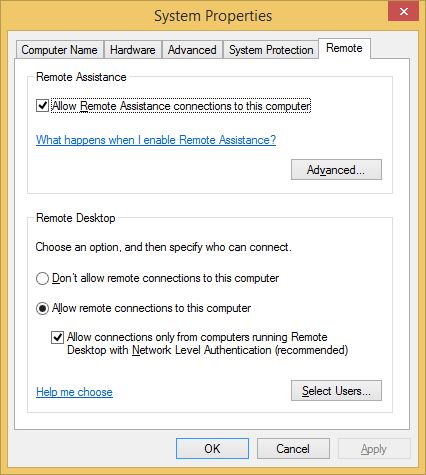
First things first - we do need to enable RDP so run sysdm.cpl and click on the Remote tab. Then click on the “Allow remote connections to this computer” radio button and check the “Allow connections only from computers running Remote Desktop with Network Level Authentication.” checkbox. Now select the users that will have access to your computer by clicking Add… When you're done lets go to step 2.
NOTE: By checking the latter you effectively and actively engage suppression of potential Man in the Middle attacks so let's count this one as a first step towards enhanced protection. Also, you might get a warning about Power Options when you enable Remote Desktop so please follow the link provided in the dialog box and configure the Power Plan of your computer as advised by the warning.
STEP 2:
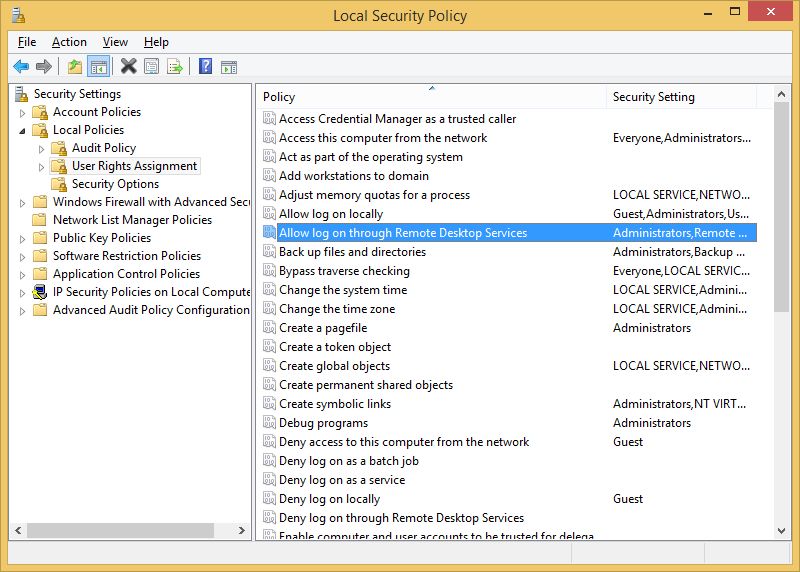
When we're done handpicking all the folks we want to have access, let's eliminate all of the 'unwanted elements'. First of - we'll have to eliminate default user groups through Local Security Policy so lets run secpol.msc and configure the following: Security Settings → Local Policies → User Rights Assignment and double click on “Allow log on through Remote Desktop Services” policy from the list to the right.
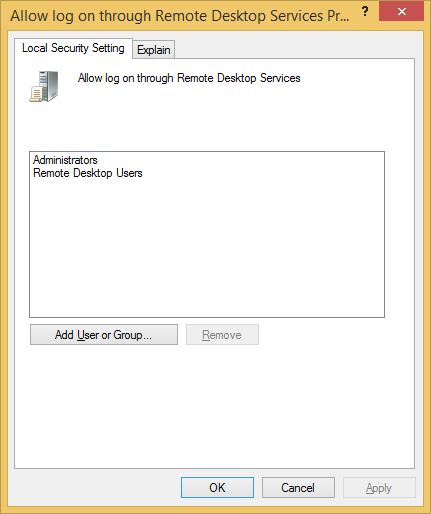
Now remove both default groups - Administrators and Remote Desktop Users and manually Add User or Group for which you'd like to be able to connect.
NOTE: We eliminate groups because we expect that since we have elevated security for this or that reason, all our users will also use complex passwords, so if we remove the Administrators group completely and latter on create a new admin account with a weak password, we are still preventing attacks since the new account will not have access until we manually add the new account the way we've done it in this step.
STEP 3:
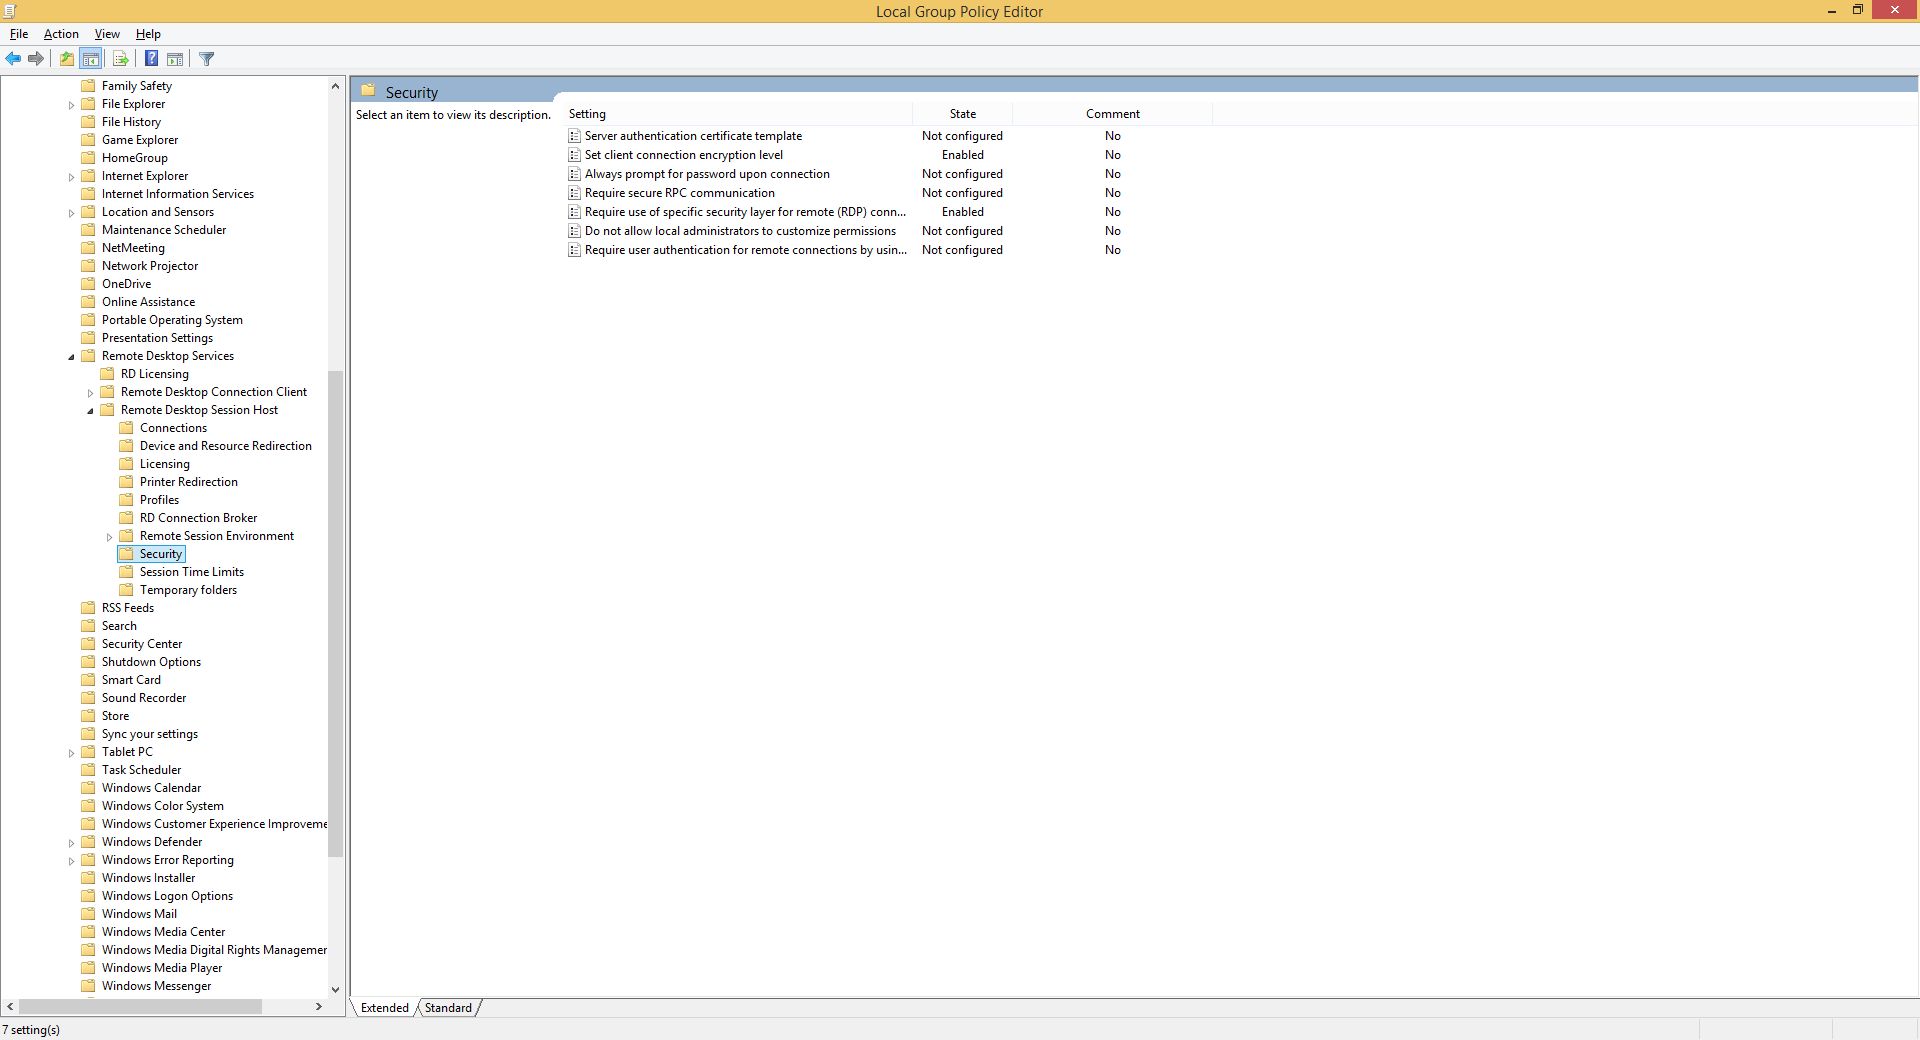
So far we've poked around user rights and the likes but now let's really get donw'n'dirty by securing the connection itself with several Local Group Policy mods. That said run the gpedit.msc and go to Local Computer Policy → Computer Configuration → Administrative Templates → Windows Components → Remote Desktop Services → Remote Desktop Session Host → Security.
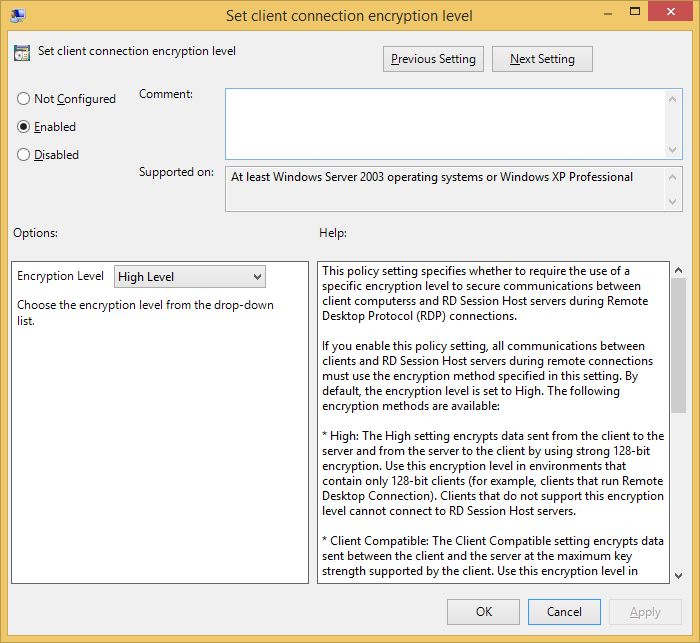
OK! The first one we need to enable is “Set client connection encryption level” and set its value to “High”. Here's an explanation of what all of the levels do and why:
By default, Remote Desktop connections are encrypted at the highest level of security available (128-bit). However, some older versions of the Remote Desktop Connection client application do not support this high level of encryption. If a high level of encryption is needed to support legacy clients, the encryption level of the connection can be configured to send and receive data at the highest encryption level supported by the client.There are four levels of encryption available:
- Low Data sent from the client to the server is encrypted using 56-bit encryption. Data sent from the server to the client is not encrypted.
- Client Compatible Encrypts client/server communication at the maximum key strength supported by the client. Use this level when the terminal server is running in an environment containing mixed or legacy clients. This is the default encryption level.
- High Encrypts client/server communication using 128-bit encryption. Use this level when the clients accessing the terminal server also support 128-bit encryption. When encryption is set at this level, clients that do not support this level of encryption will not be able to connect.
- FIPS Compliant All client/server communication is encrypted and decrypted with the Federal Information Processing Standards (FIPS) encryption algorithms. FIPS 140-1 (1994) and its successor, FIPS 140-2 (2001), describe U.S. government requirements for encryption.
NOTE: FIPS Compliant option is disabled by default in System Cryptography and just to let you know that the practice of using FIPS became a no-no if latest Microsoft views on security are to be taken into account so we'll leave enabling and using it for a different topic altogether.
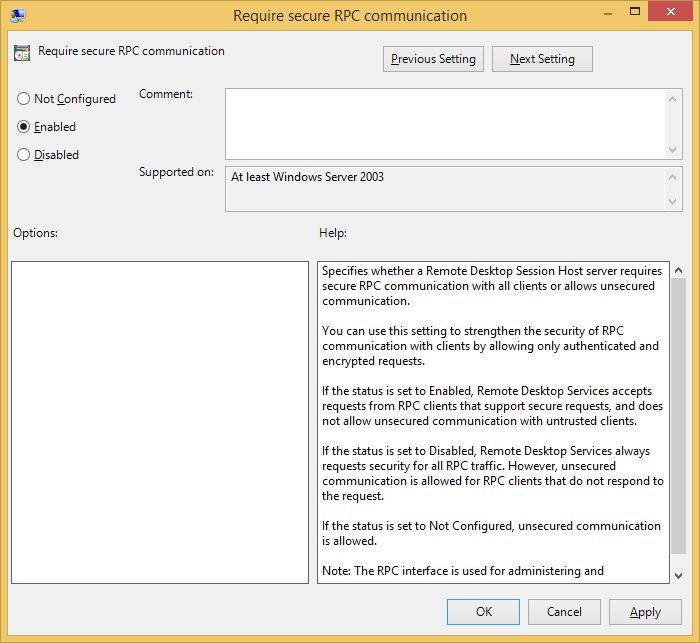
Now then let's Enable the “Require secure RPC communication” policy…
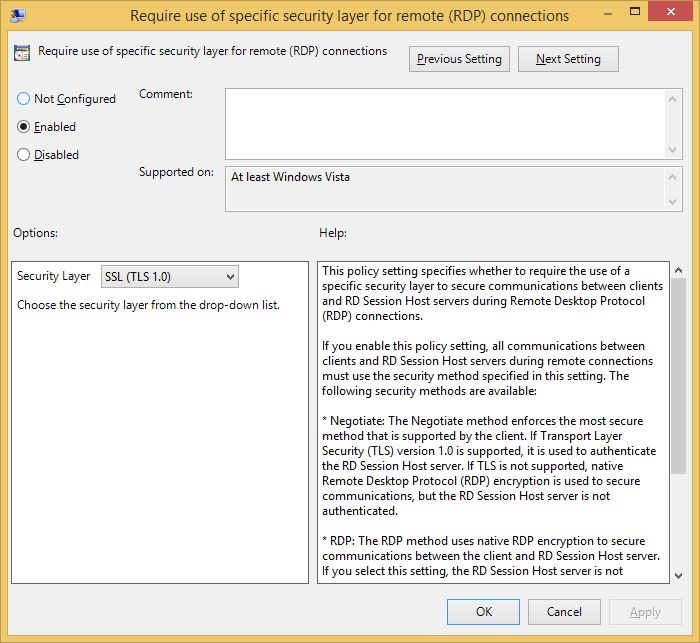
…and by doing so we can now use TLS encryption by setting the “Require use of specific security layer for remote (RDP) connections” policy to Enabled and selecting SSL (TLS 1.0) from the “Security Layer” drop-down list.
But let's take a moment here and see all our options and why we would want to use anything else:
By default, RD Session Host sessions use native RDP encryption. However, RDP does not provide authentication to verify the identity of an RD Session Host server. You can enhance the security of RD Session Host sessions by using Secure Sockets Layer (SSL) Transport Layer Security (TLS 1.0) for server authentication and to encrypt RD Session Host communications. The RD Session Host server and the client computer must be correctly configured for TLS to provide enhanced security.
The three available security layers are:
- SSL (TLS 1.0) SSL (TLS 1.0) will be used for server authentication and for encrypting all data transferred between the server and the client.
- Negotiate The most secure layer that is supported by the client will be used. If supported, SSL (TLS 1.0) will be used. If the client does not support SSL (TLS 1.0), the RDP Security Layer will be used. This is the default setting.
- RDP Security Layer Communication between the server and the client will use native RDP encryption. If you select RDP Security Layer, you cannot use Network Level Authentication.
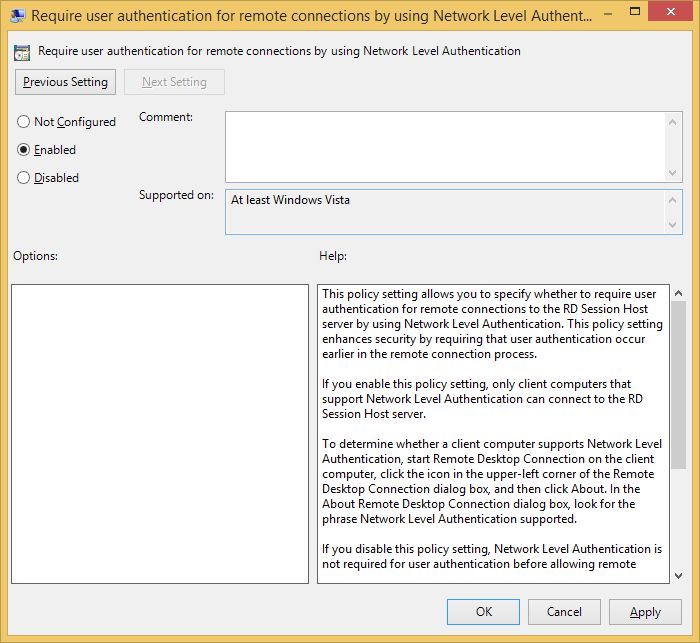
And finally: Enable the “Require user authentication for remote connections by using Network Level Authentication” policy.
All setup in the Policy department and now we can move on to the final step.
STEP 4:
All of the Windows using world by now knows what a port is, what it's used for and can probably name at least ten basic ports and explain their uses. That said, and given we already went through all this trouble to setup a most secure RDP connection it would so not be a good idea to leave the default 3389 port 'alive' and listening for connection requests so let's obfuscate a little bit.
Open up your Registry by running regedit.exe and find the following HKEY_LOCAL_MACHINE → SYSTEM → CurrentControlSet → Control → Terminal Server → WinStations → RDP-Tcp.
Now double click the PortNumber DWORD and change it's Decimal value to a five-digit number lower then 65535. I'll pick 38389.
All done so now let's finish this by creating a new Firewall rule for the newly set RDP port. Open Windows Firewall with Advanced Security by running wf.msc and create a New Inbound Rule by right-clicking on Inbound Rules and selecting New Rule… from the dropdown menu. When the “New Inbound Rule Wizard” pops up select “Port” then “TCP” and enter the new port number under the “Specify” field and then just NEXT your way until you get to the last page when a name is required. I'd recommend something like “RDP Port” or if you'd like for no one else to know what's it used for then try something like “Dr. Vlad's security shenanigans” ;)
We're done and by now I reckon you didn't figure it's gonna be that much work just to secure a lil' ole Remote Connection did ya!? Yikes!
